🥖 Sourdough Series #1: How to Bake Your First Sourdough Bread (A Beginner Guide) 🥖
If you’ve ever wanted to bake your own sourdough bread but felt overwhelmed… you’re not alone. I was there too!
I want to start by saying: I am not a professional baker. I’m still learning with every loaf I make. Some weeks my bread is beautiful, some weeks it’s just fine.
I learned this process by watching one specific video, and then I slowly adapted things as I went. This is now the recipe and method I use every single week, and it works for me and my lifestyle as a busy mom.
If you bake your first loaf after reading this, I would love to hear from you! And if you have tips, suggestions, or things that worked for you, please leave a comment and share. We’re learning together here 🤍
This post will give you the essentials to bake your first loaf. In this sourdough series, we’ll go deeper into topics like starter care, troubleshooting, timing, and shaping. Ps: All images in this post are my own!
Let’s begin!!
Affiliate Disclosure: Some of the links in this post may be affiliate links, which means I may earn a small commission if you choose to purchase through them, at no extra cost to you. I only share products that I personally use. Thank you for supporting my work and this space!
🥖 Why Sourdough?
For me, sourdough is more than just bread. It’s a slow, intentional process.
Many people love sourdough because:
It’s made with just a few ingredients
It’s naturally fermented
It may be easier to digest
It connects us to homemade, from-scratch living
It’s also such a beautiful way to slow down in a world that’s always rushing. And I absolutely love seeing the result and sitting to eat it with my family!
🫙 What You Need to Start
You don’t need fancy tools. Truly. But if you want to make your life easier, this is the starter kit I got from Amazon.
Ingredients
Active sourdough starter - I recommend getting a starter from someone else rather than starting your own since you’re just beginning.
Bread flour (It HAS to be bread flour, not just regular flour! If organic, even better!)
Filtered Water
Salt
Basic tools
A bowl
A spoon or your hands
Plastic wrap
A Dutch oven (or something with a lid that can go in the oven)
That’s it. You can always upgrade later. But again, if you prefer to make you life easier, here’s the link for the starter set I have from Amazon.
My Weekly Sourdough Recipe
This recipe makes one small loaf, which is enough for our family’s breakfast plus some leftovers slices. There are many many different recipes and steps out there, this is what has been working for me so I hope it works for you too! You can always adapt and change things as you get more confident with it.
Ingredients
80g active starter
250g water
350g bread flour
10g salt
Step by Step
🥖 Step 1: Feed Your Starter
Before baking, you need an active sourdough starter. This is what makes your bread rise naturally. I recommend getting a little bit of starter from someone you know, so you don’t overwhelm yourself making a starter from scratch. You’ll keep your starter in the fridge.
To prepare enough starter for one loaf, this is the feeding ratio I use:
Starter feeding:
10g sourdough starter
20g water
20g organic bread flour
Get your starter out of the fridge and allow it to get to room temperature. Mix these 3 ingredients in a jar or glass container until fully combined. The sourdough set I mentioned before has a jar with measuring tape so you can mark where your starter is, and have a better idea of how much it grew.
Then let it sit at room temperature.
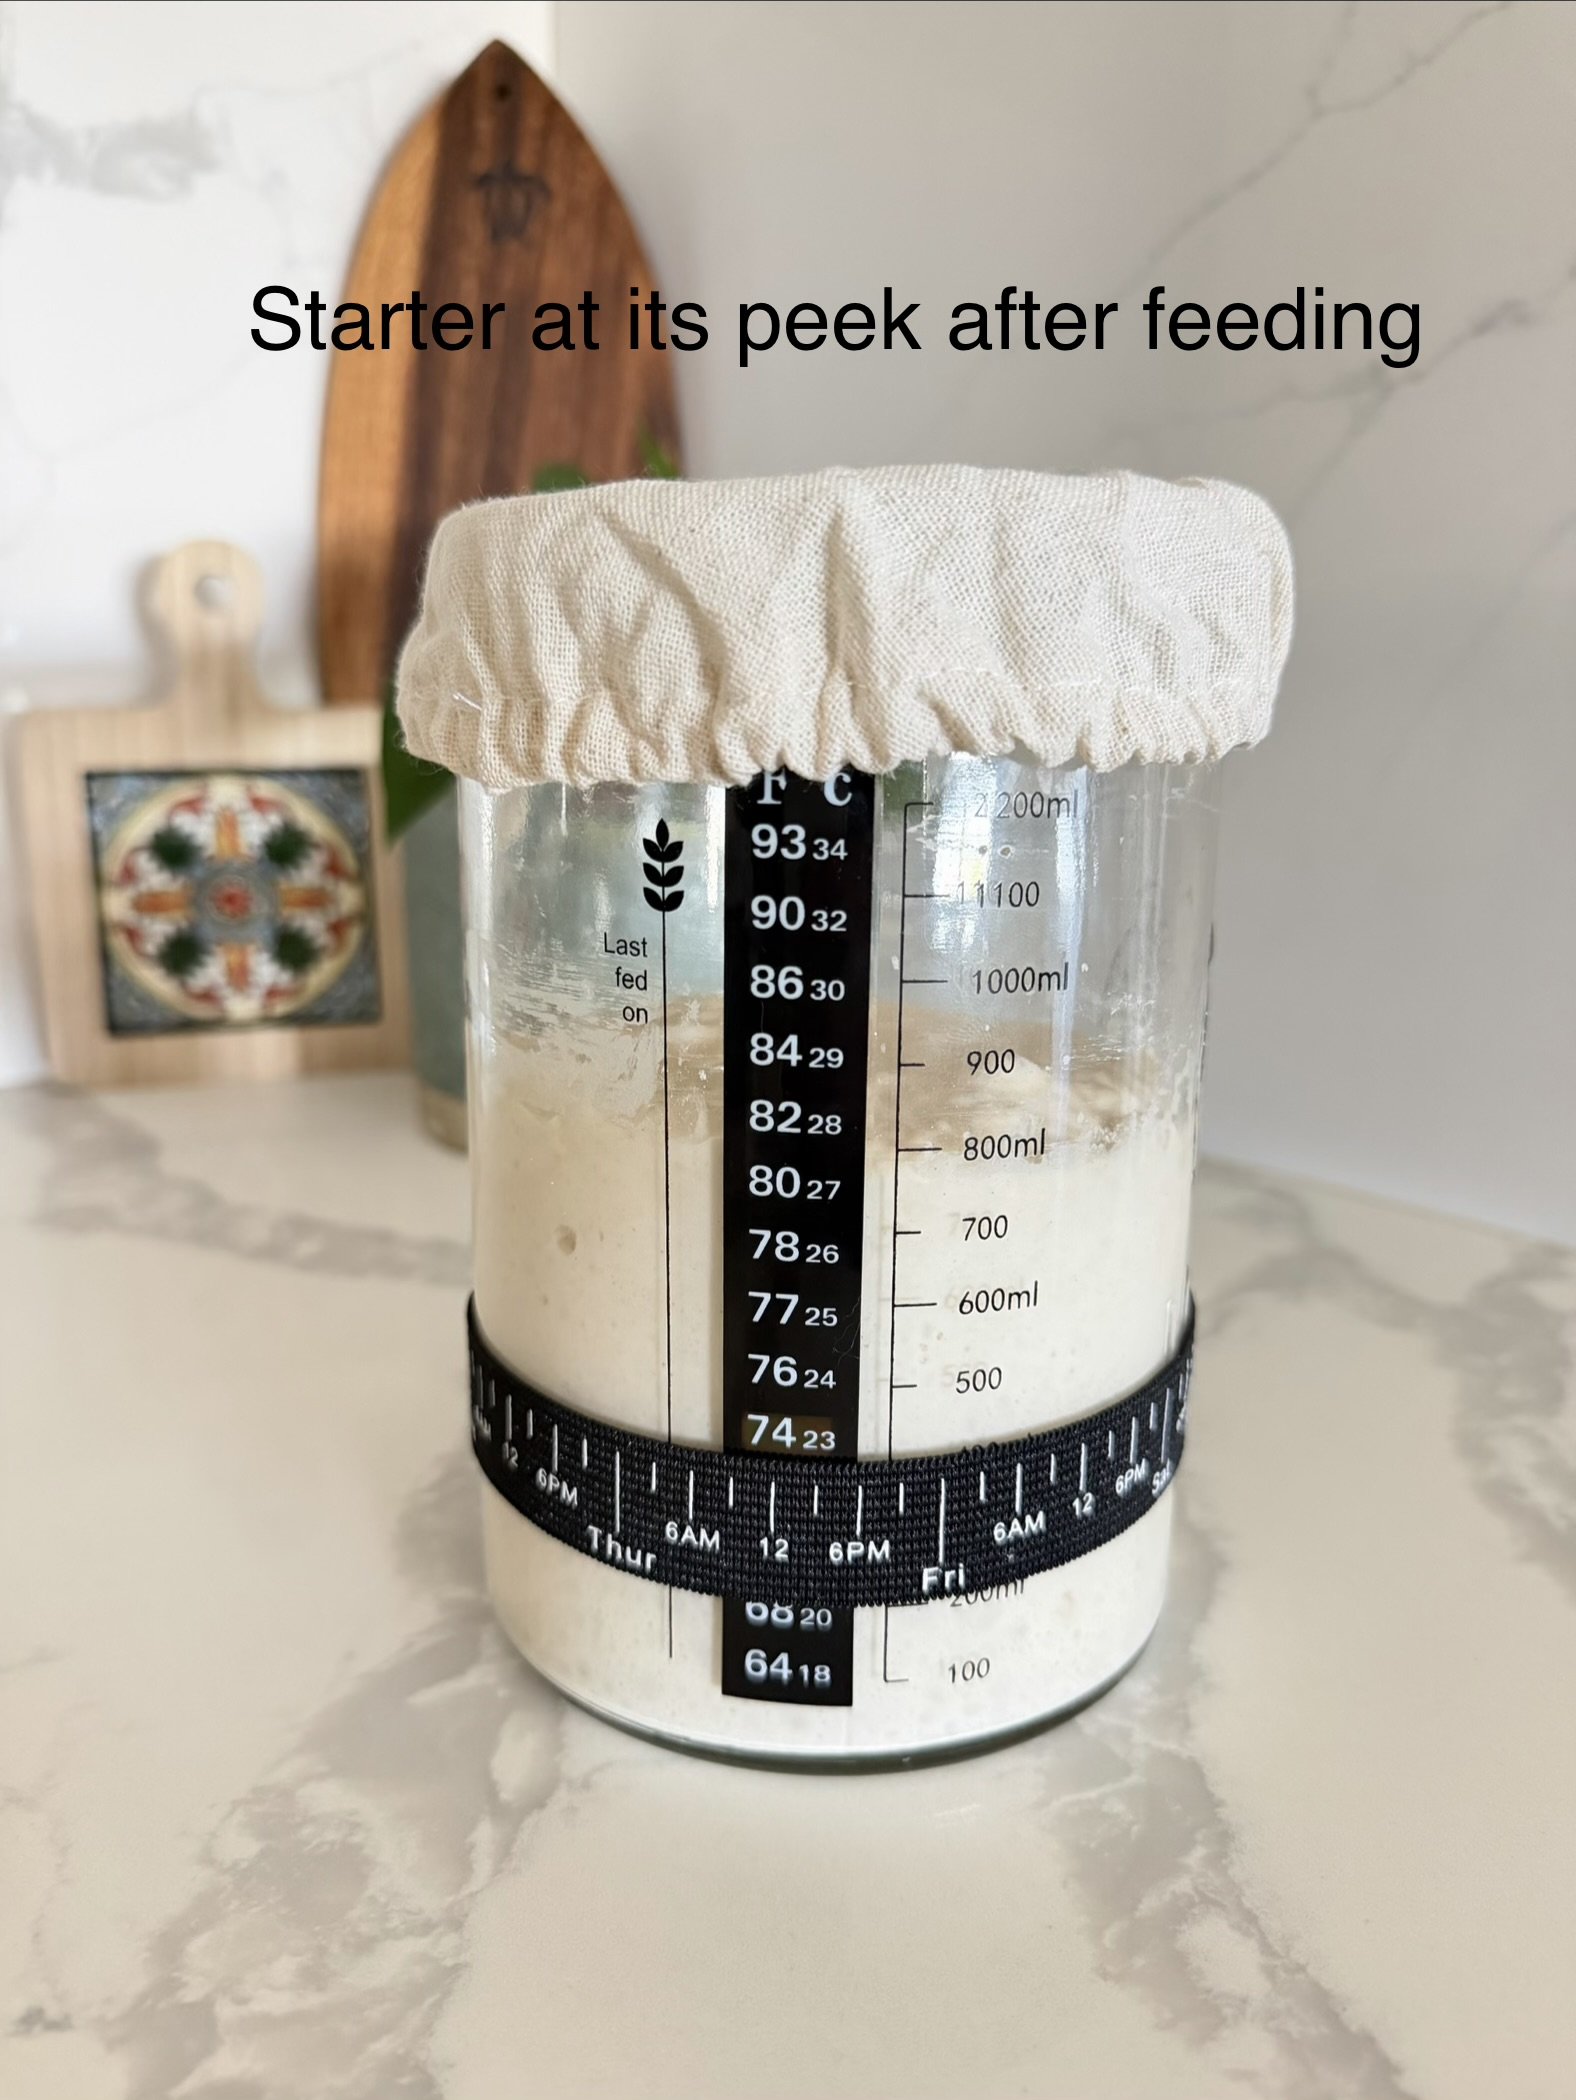
Time varies by feeding ratio (topic for another full post coming soon!), but with the ratio I just shared (1:2:2), your starter should begin to rise and fill with bubbles in around 6 hours.
When it’s ready, it will look:
At least doubled in size
Puffy and jiggly
Bubbly
Slightly domed on top
This happens because the natural yeast and bacteria in the starter are eating the flour and producing gas, which is what will eventually make your bread rise.
A simple test: if you scoop a little and it looks airy and stretchy, it’s ready to use.
Once your starter is active, you can begin mixing your dough.
Ps: You’ll save at least 10g of this starter you just fed for your next bread. Put it in a clean glass jar inside your fridge until you’re ready to bake again. You’ll always do that: remove it from the fridge, feed it, let it rise, use some to bake and some to save for the next time. If you have too much saved, you can start trying other recipes using what you would discard. We call them Sourdough Discard Recipes, and I’ll share my favorite ones during this series!
🥖 Step 2: Mix the Dough

In a large bowl mix:
80g active starter
250g water
Stir until the starter dissolves into the water. (I like using the dough whisk that comes in the set I mentioned before)
Then add:
350g bread flour
Mix everything with the dough mix again, until it is combined and you have a shaggy dough.
Cover with plastic wrap and let it rest for 30 minutes. This rest period allows the flour to fully absorb the water and makes the dough easier to work with.
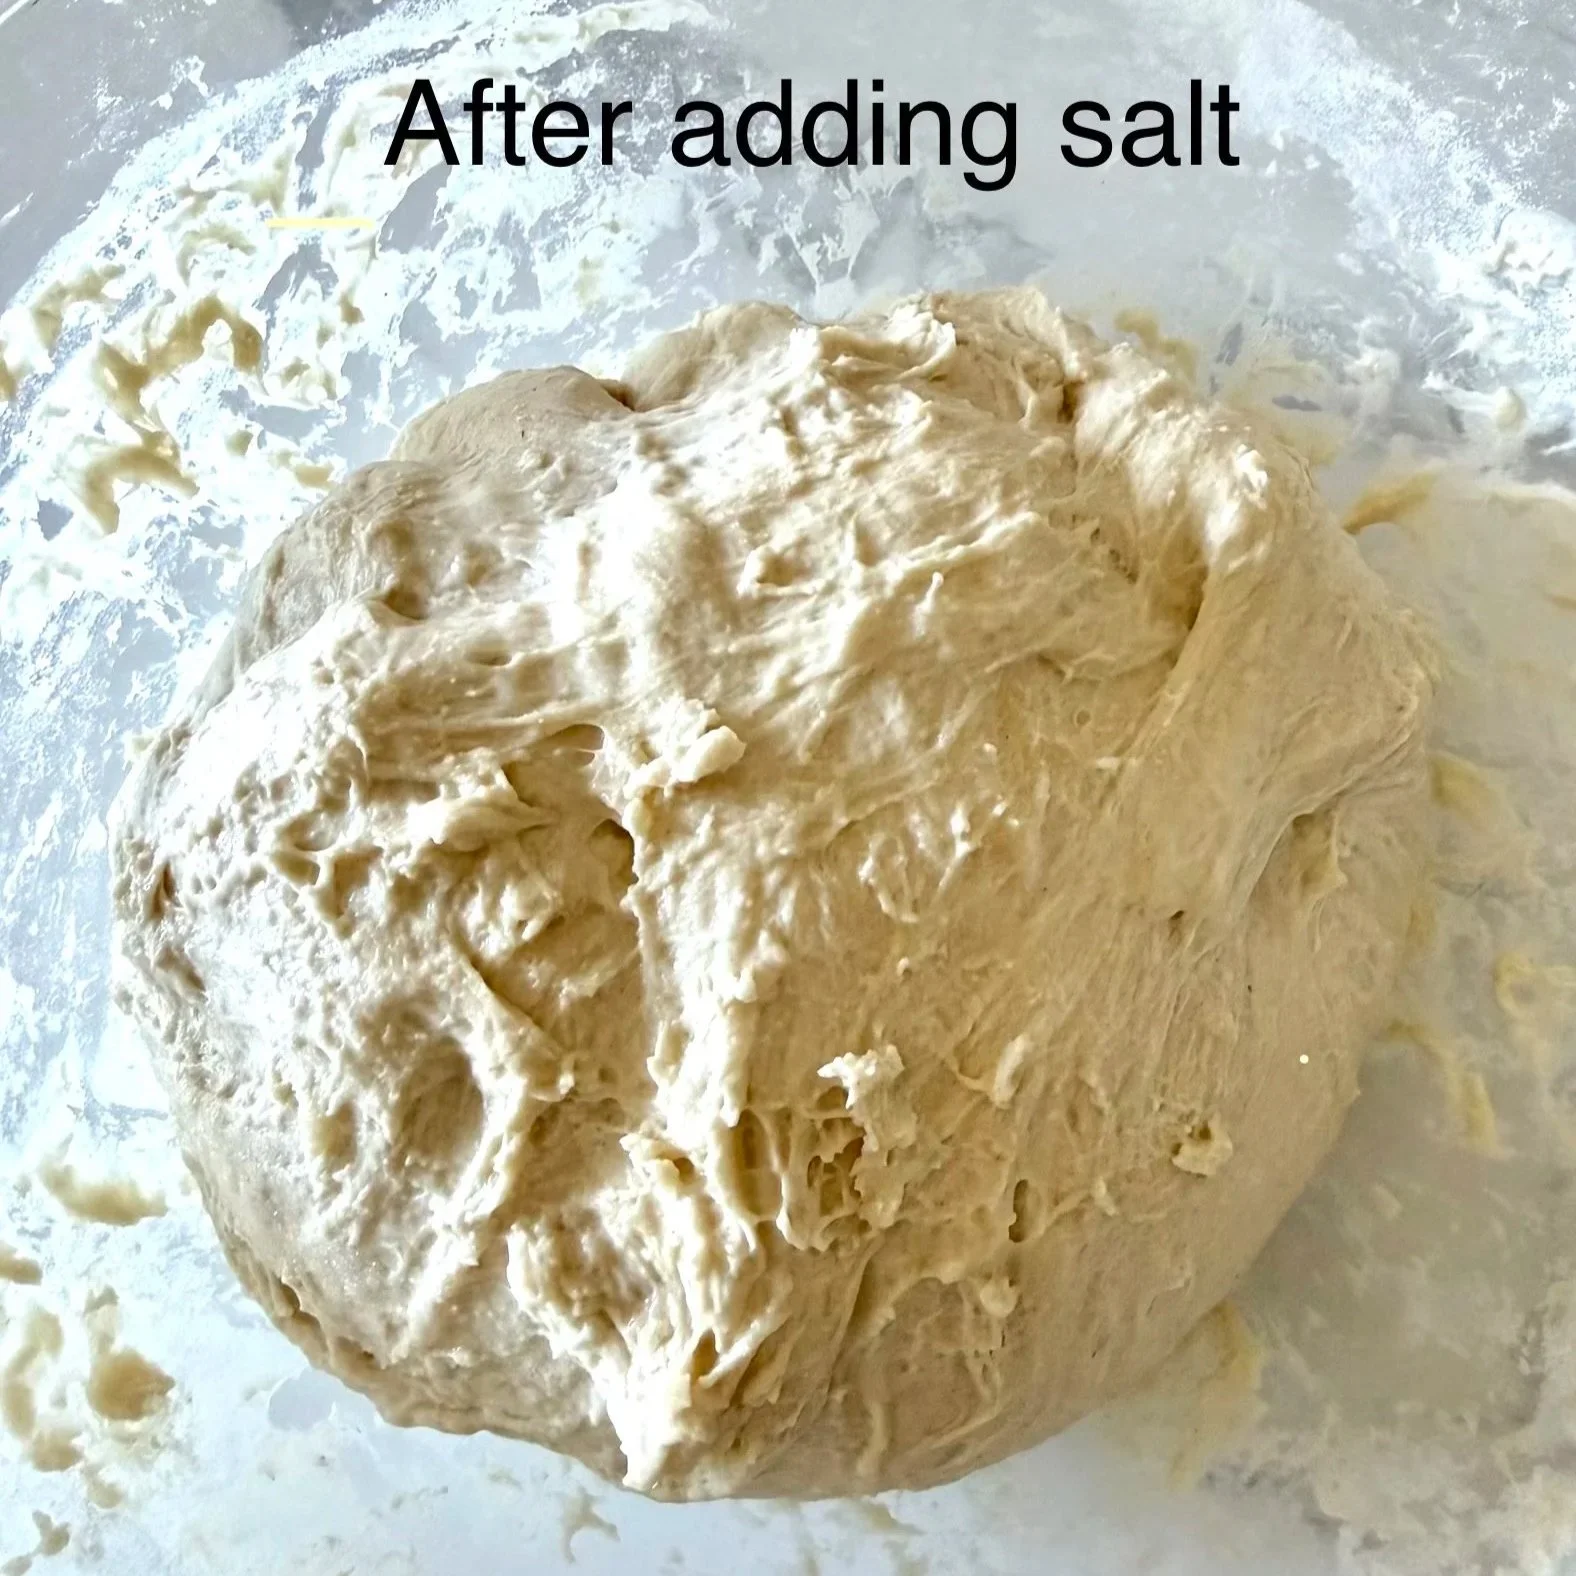
After resting, add:
10g salt
Mix again until the salt is incorporated.
This is where I start using my hands to handle the dough. I like using these cooking gloves for that. Let it rest for 30 minutes more.
🥖 Step 3: Stretch and Fold the Dough
Over the next hours, you will strengthen the dough by folding it. This helps develop gluten and build structure so your bread can hold its shape.
I usually start with 1 or 2 rounds of stretch and folds. I switch to coil folds when I see the dough already has some structure. (During the process of the bread shown on these pictures I did only 1).

-How to do a stretch and fold:
Wet your hands so the dough doesn’t stick.
Grab one side of the dough.
Gently stretch it upward.
Fold it over the center.
Turn the bowl and repeat on all sides.
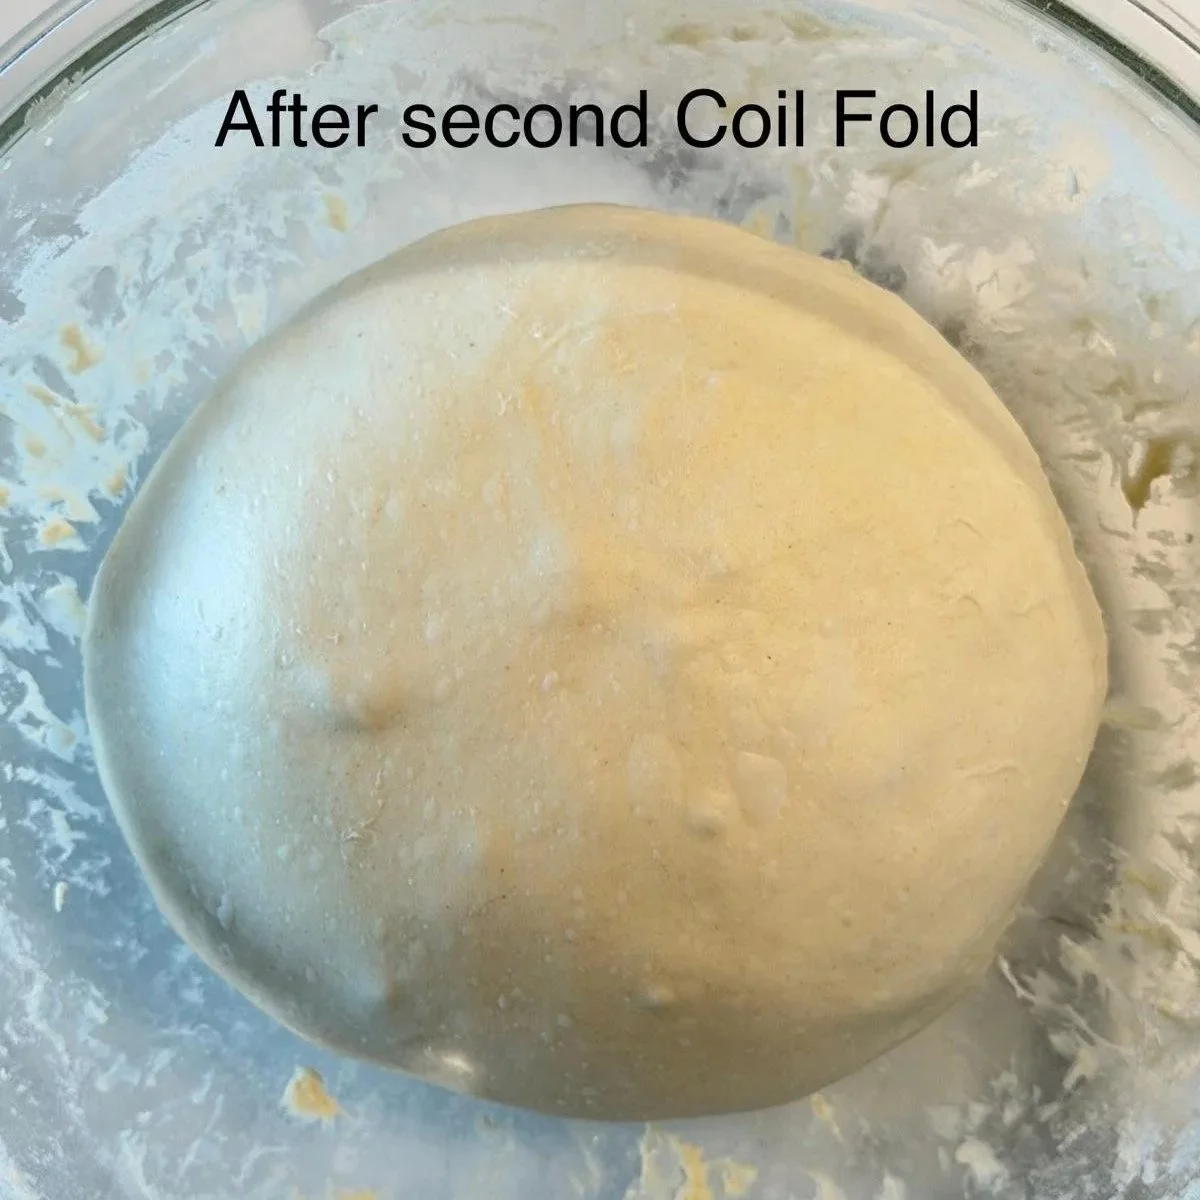
After the first couple rounds, the dough usually becomes stronger and smoother. At this point, I switch to coil folds.
Coil folds are a gentler way to continue strengthening the dough once it has already developed some structure.
Instead of stretching from the sides, you lift the dough from the middle.
-How to do a coil fold:
Slide both hands under the center of the dough.
Lift the dough upward.
Let the ends fold naturally underneath themselves as you place it back down.
The dough will almost fold like a soft blanket, creating layers without deflating the air bubbles.
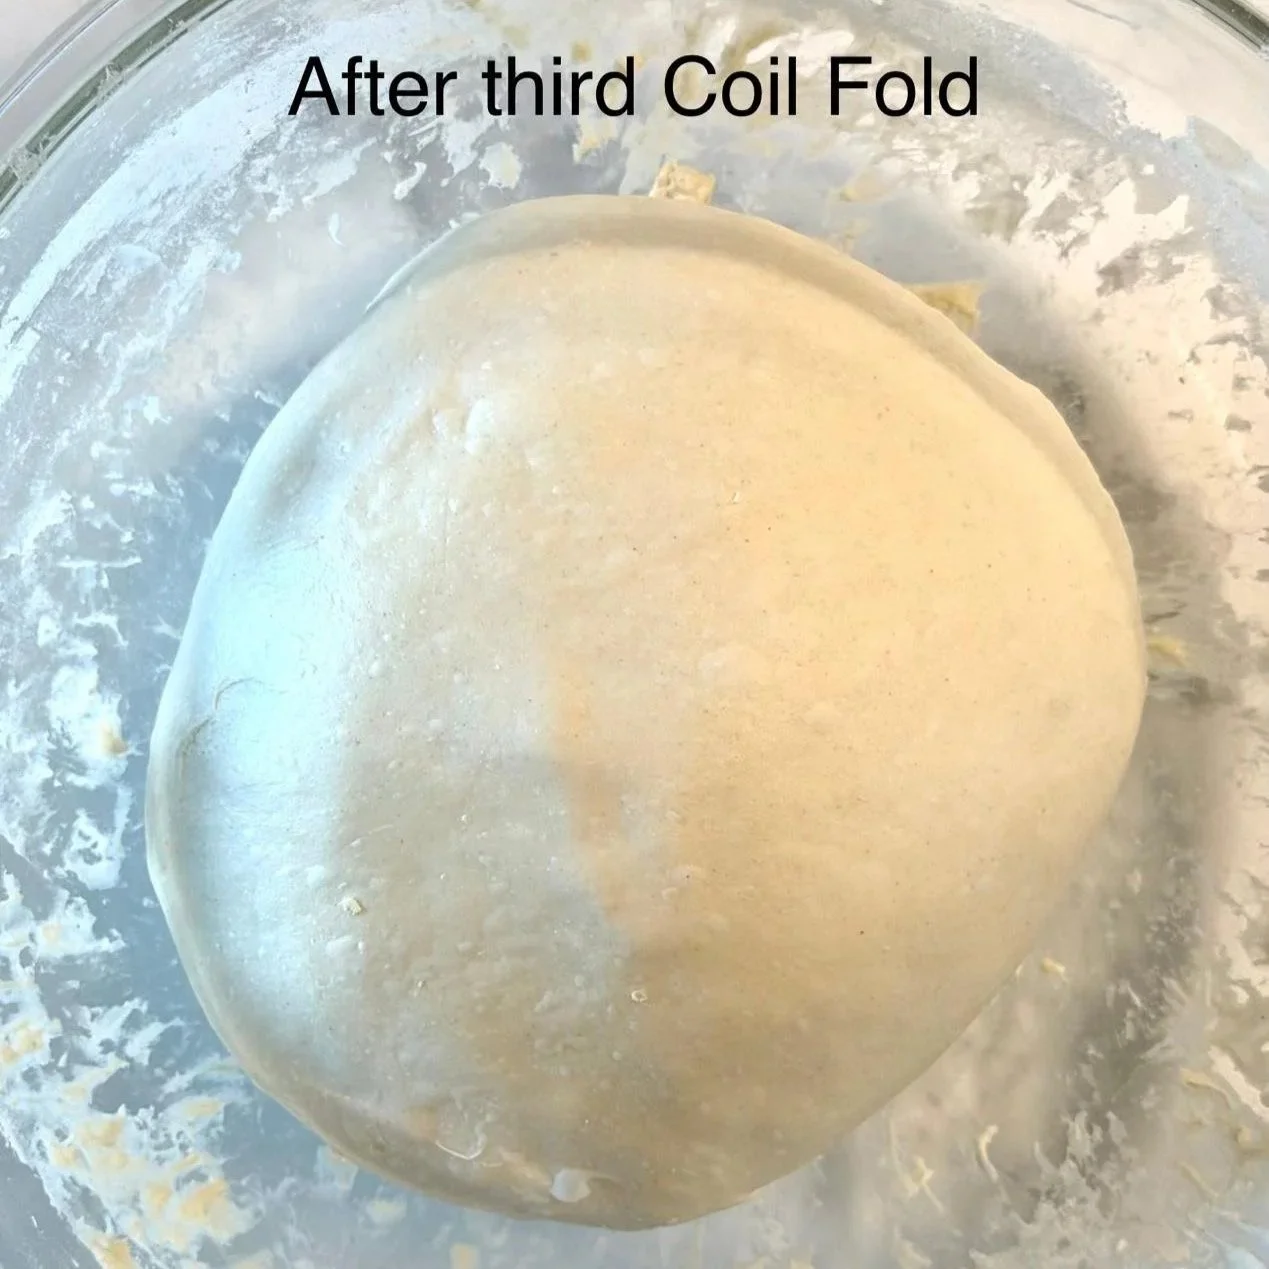
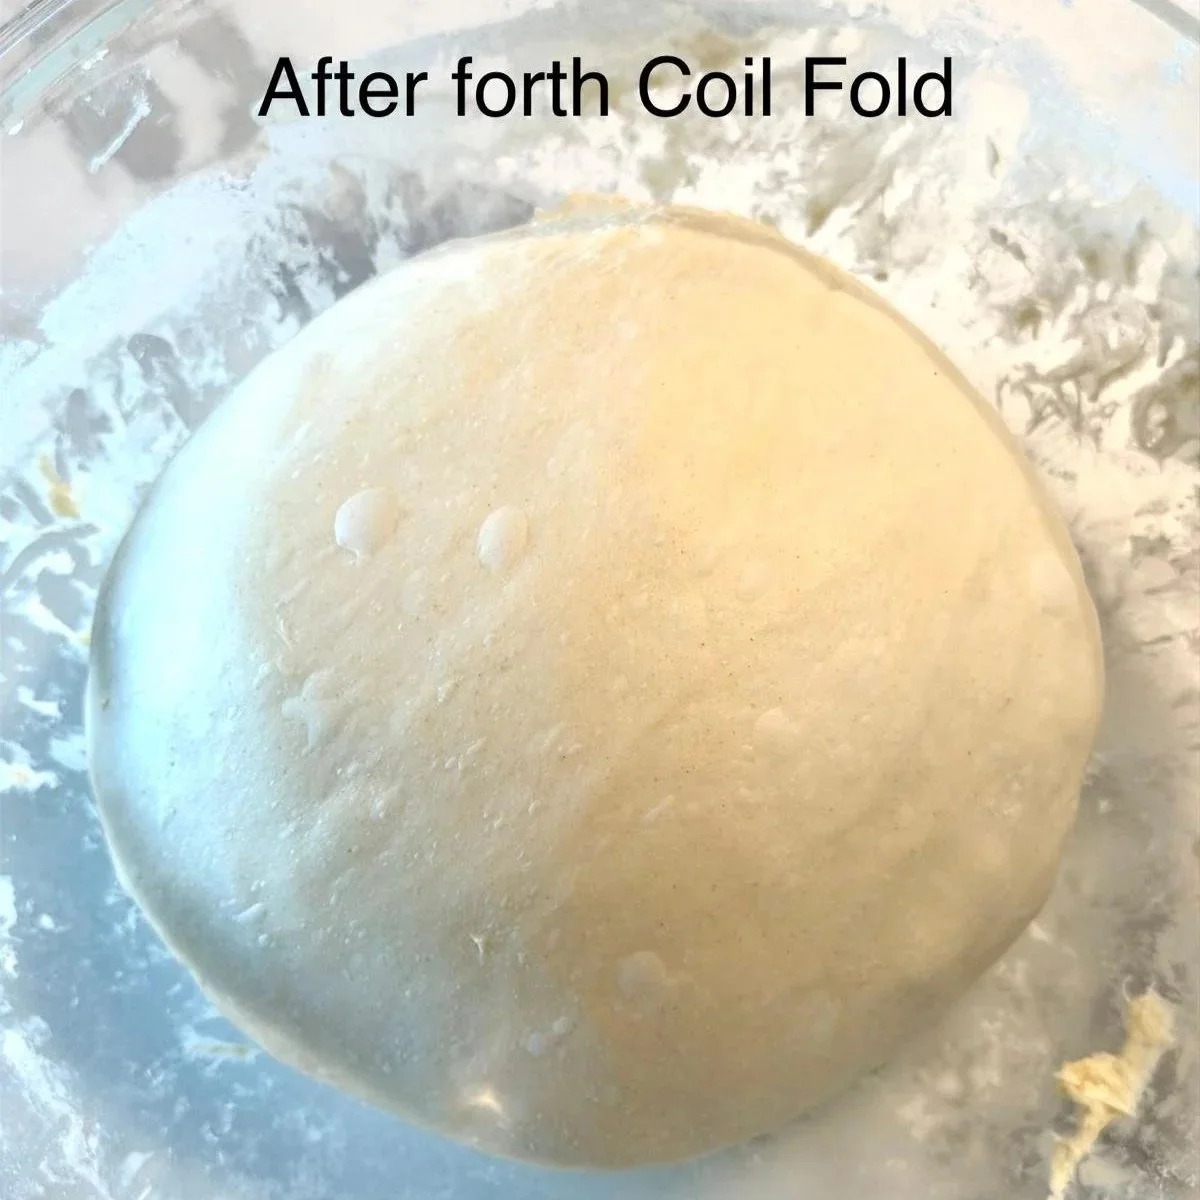
I usually do about 4 coil folds, spaced about 30 minutes apart.
By the end of this process your dough should feel:
smoother
stronger
slightly airy
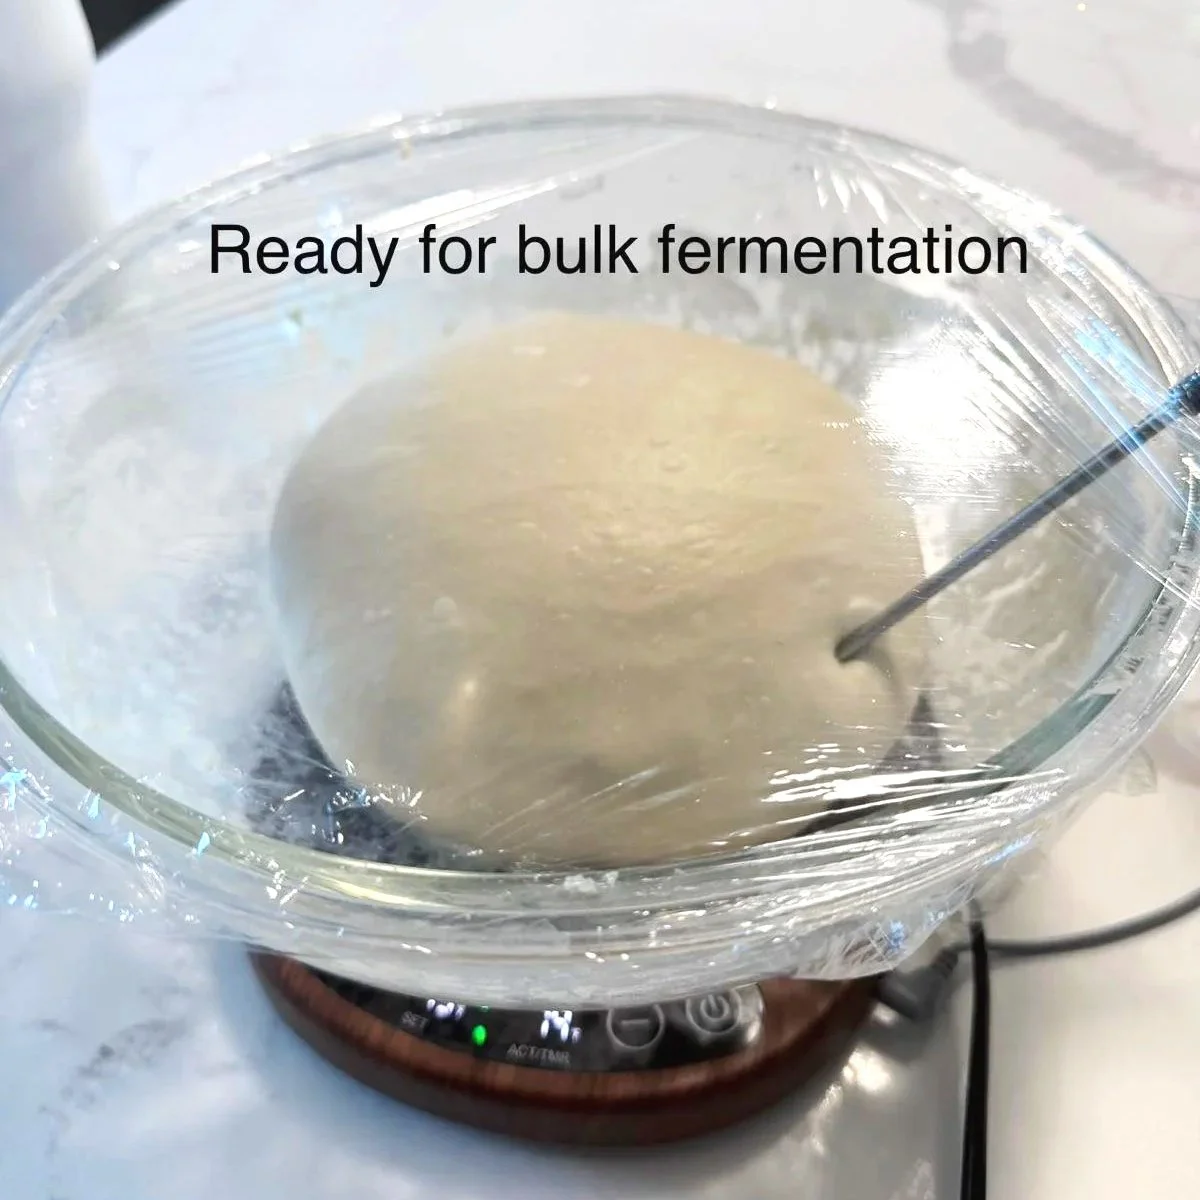
Then you’ll let it continue resting for bulk fermentation.
Below you can see the evolution of the dough after the 4 coil folds I did for this bread:

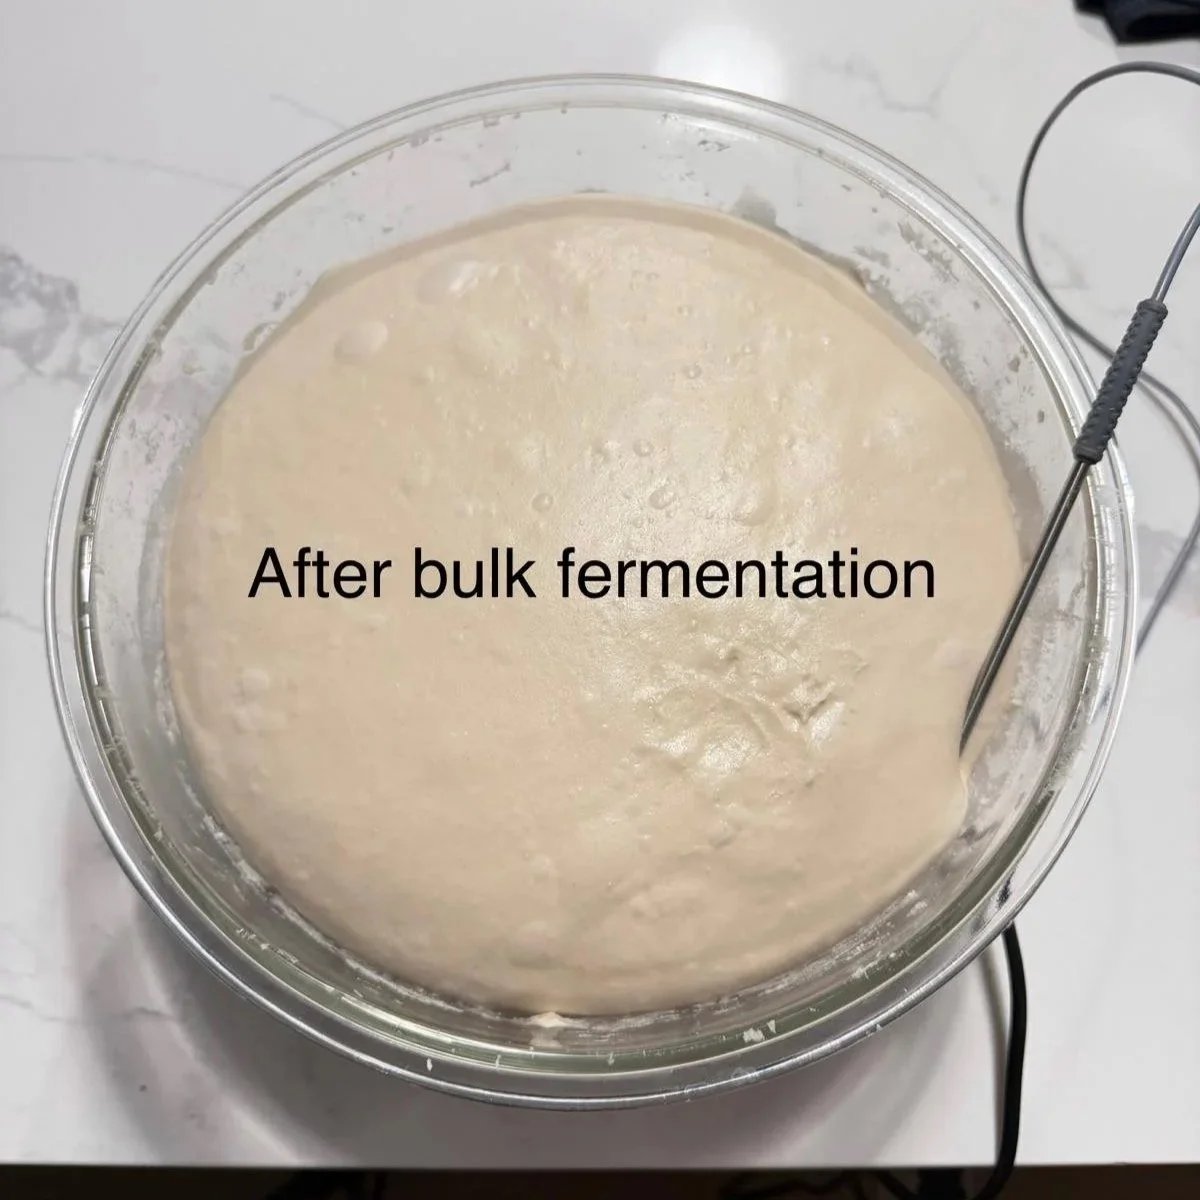
🥖 Step 4: Bulk Fermentation
After your folds, let the dough rest and rise. This stage is called bulk fermentation.
During this time the natural yeast continues producing gas, which creates bubbles inside the dough.
Your dough is ready when it:
Looks puffy
Has visible bubbles
Jiggles slightly when you move the bowl
Has grown in size
This usually takes 4–8 hours, depending on how warm your kitchen is. Try to watch the dough instead of the clock. During winter I struggled a lot more with the bulk fermentation because of the temperature of my kitchen, so I got this sourdough warmer and I do not regret it! Now I use it even during summer to keep the dough at around 80°F every time.
🥖 Step 5: Shape the Dough
Gently remove the dough from the bowl onto a lightly floured surface.
Shape it into a ball and place the shaped dough into:
A floured banneton
orA bowl lined with a floured towel
Cover the dough and place it in the refrigerator.
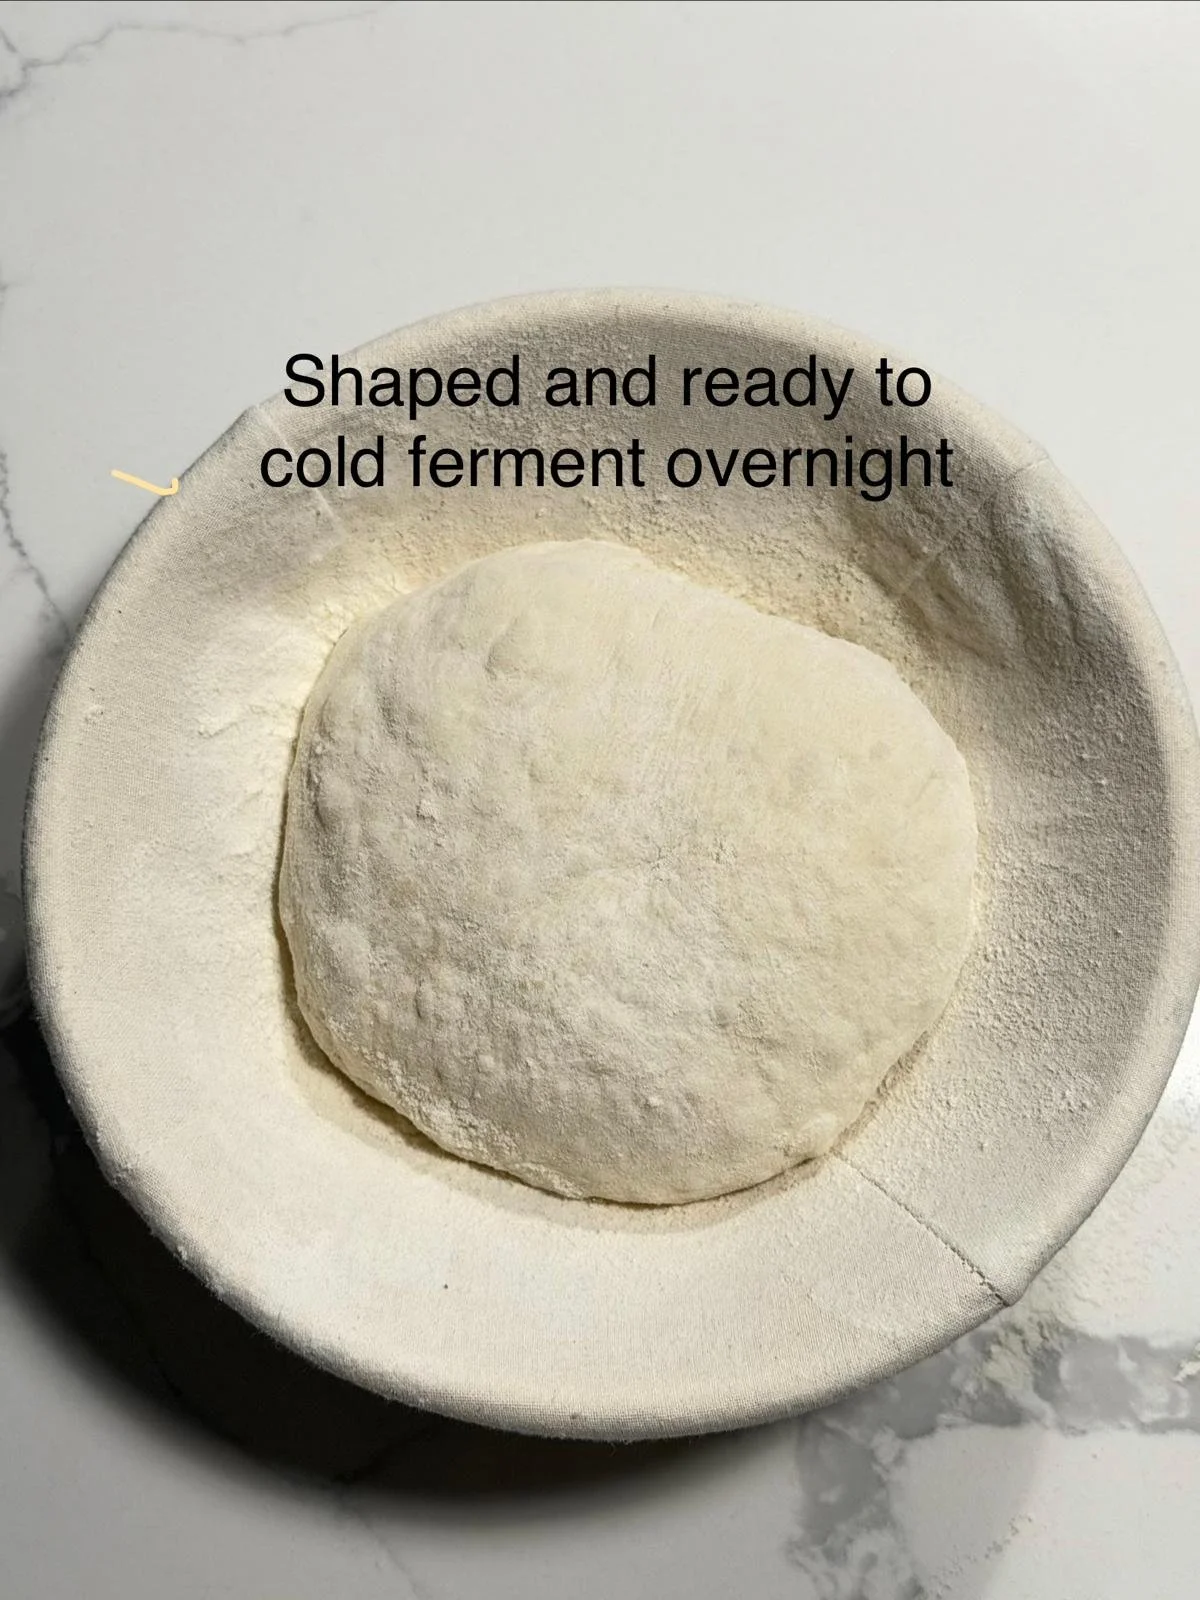

🥖 Step 6: Cold Ferment Overnight
Let it rest overnight or up to 24 hours.
This slow fermentation develops flavor and makes the dough easier to score and bake the next day.
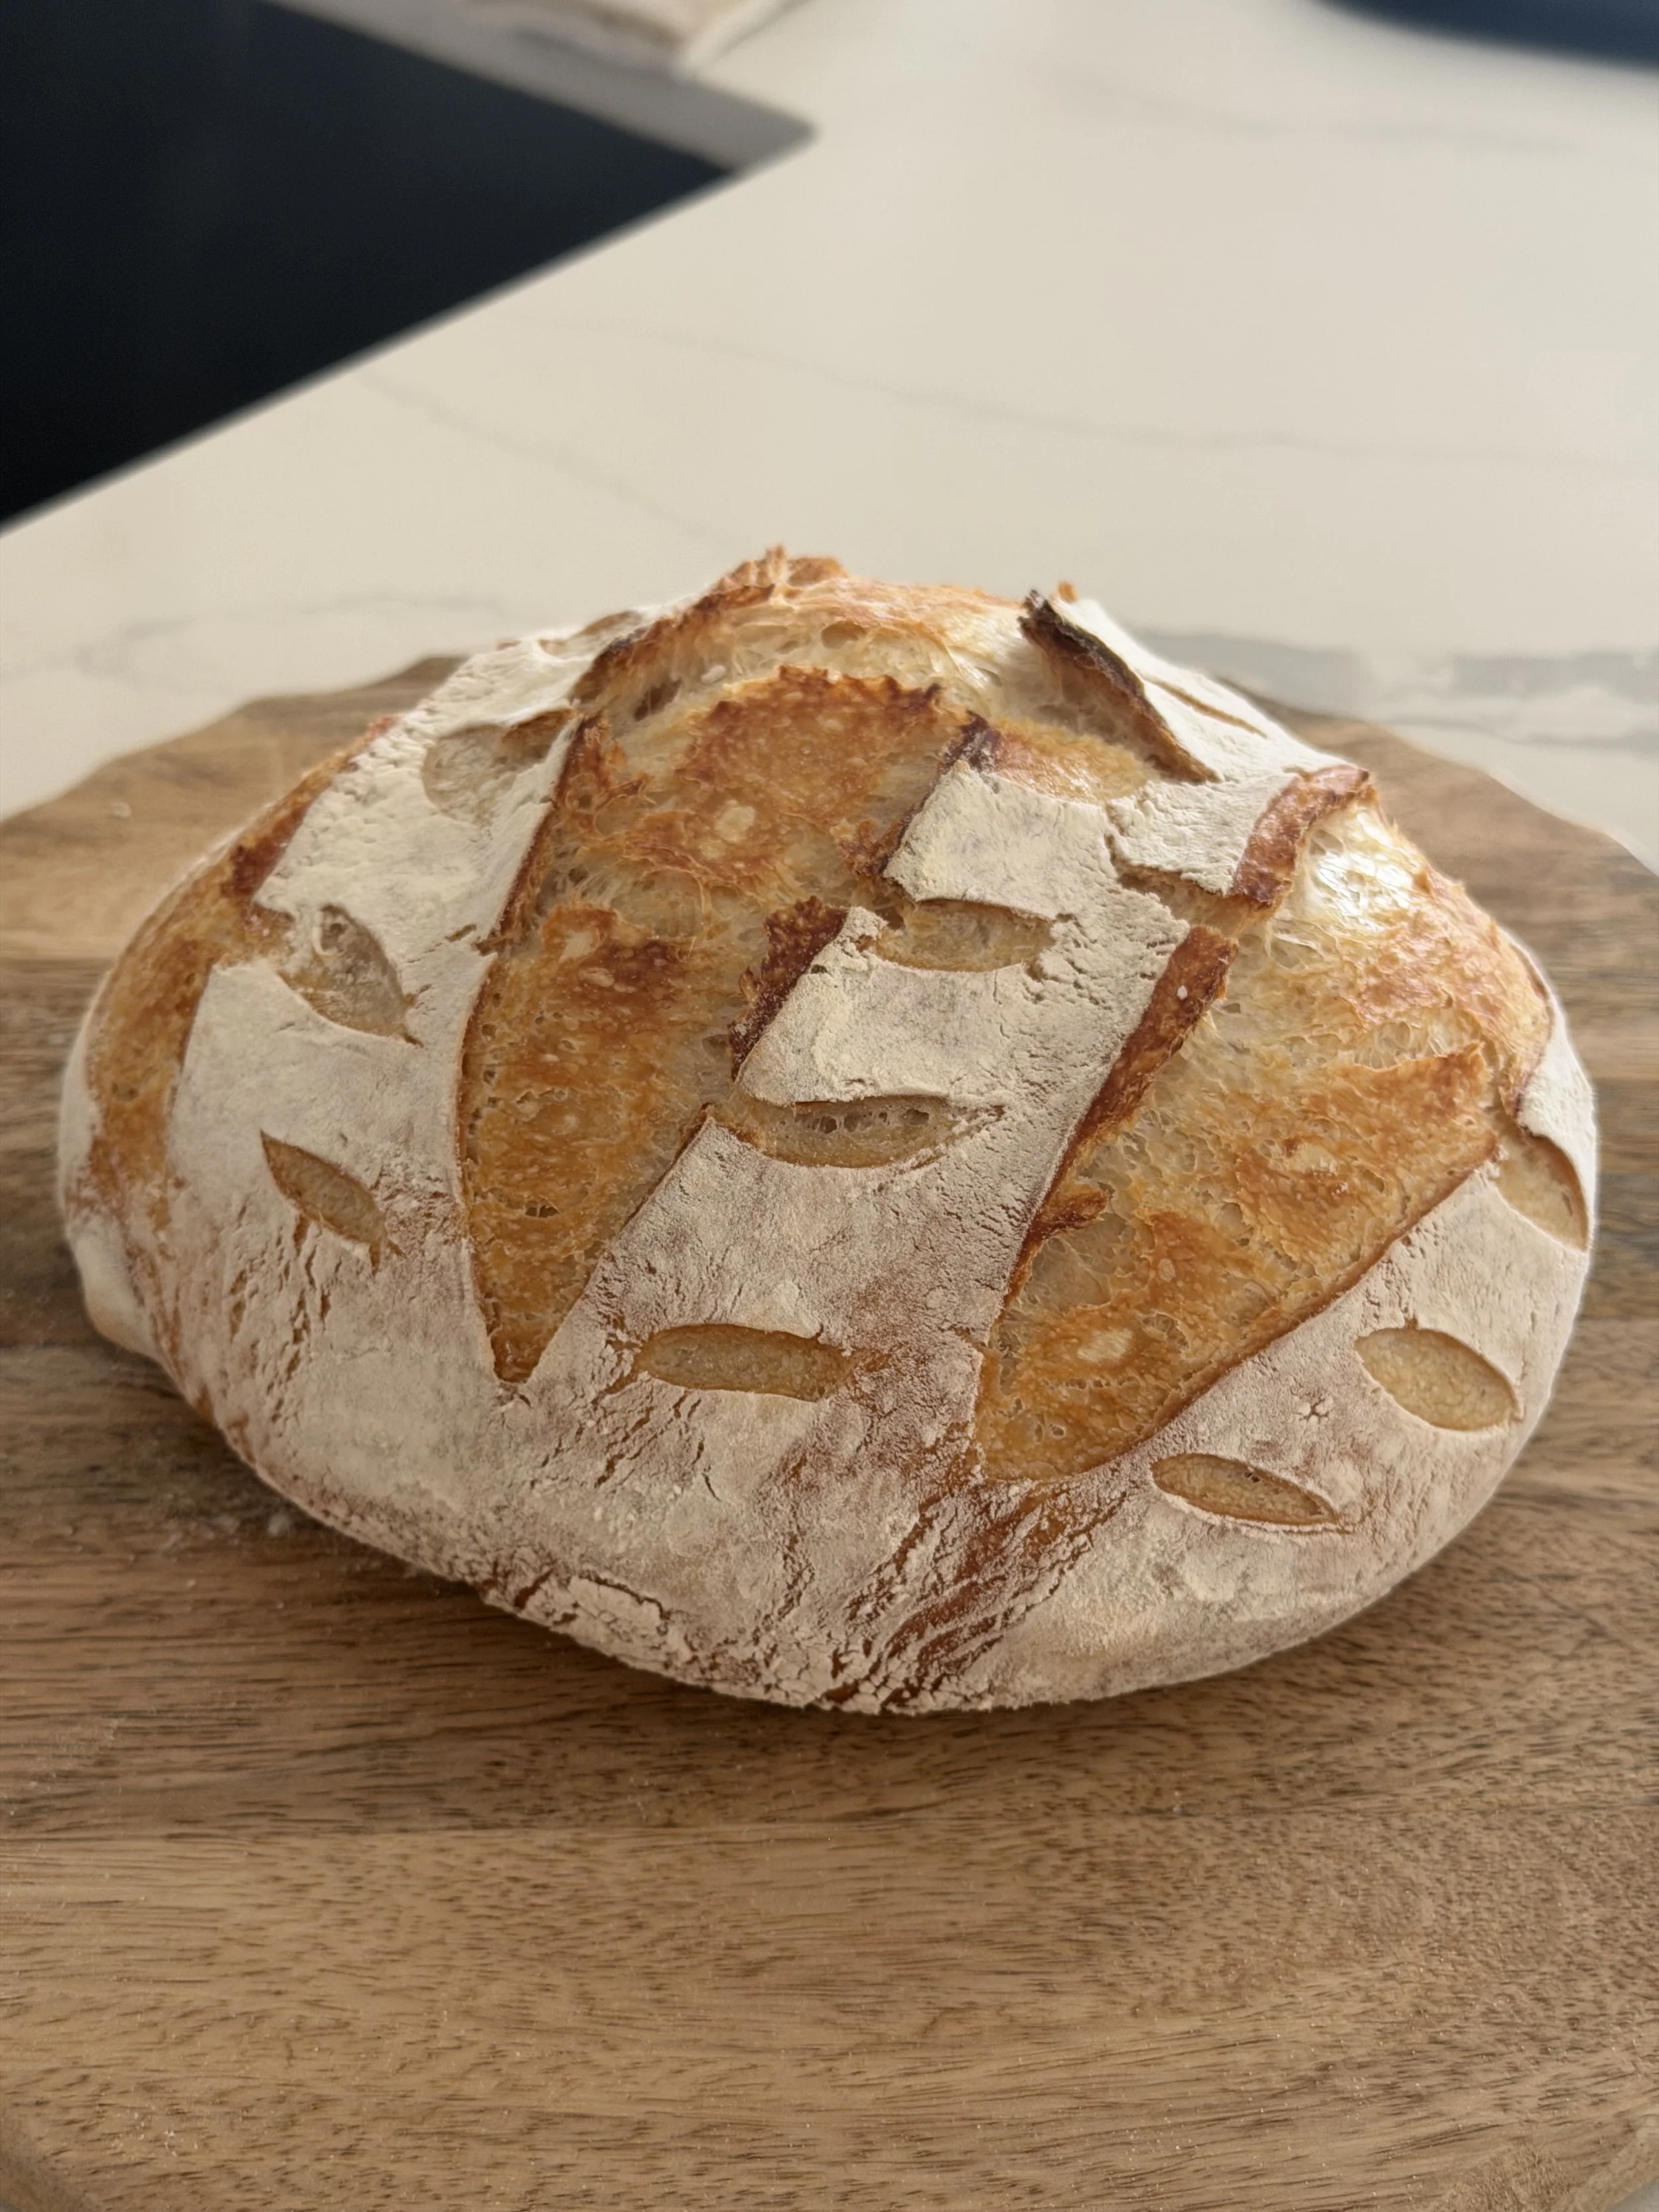
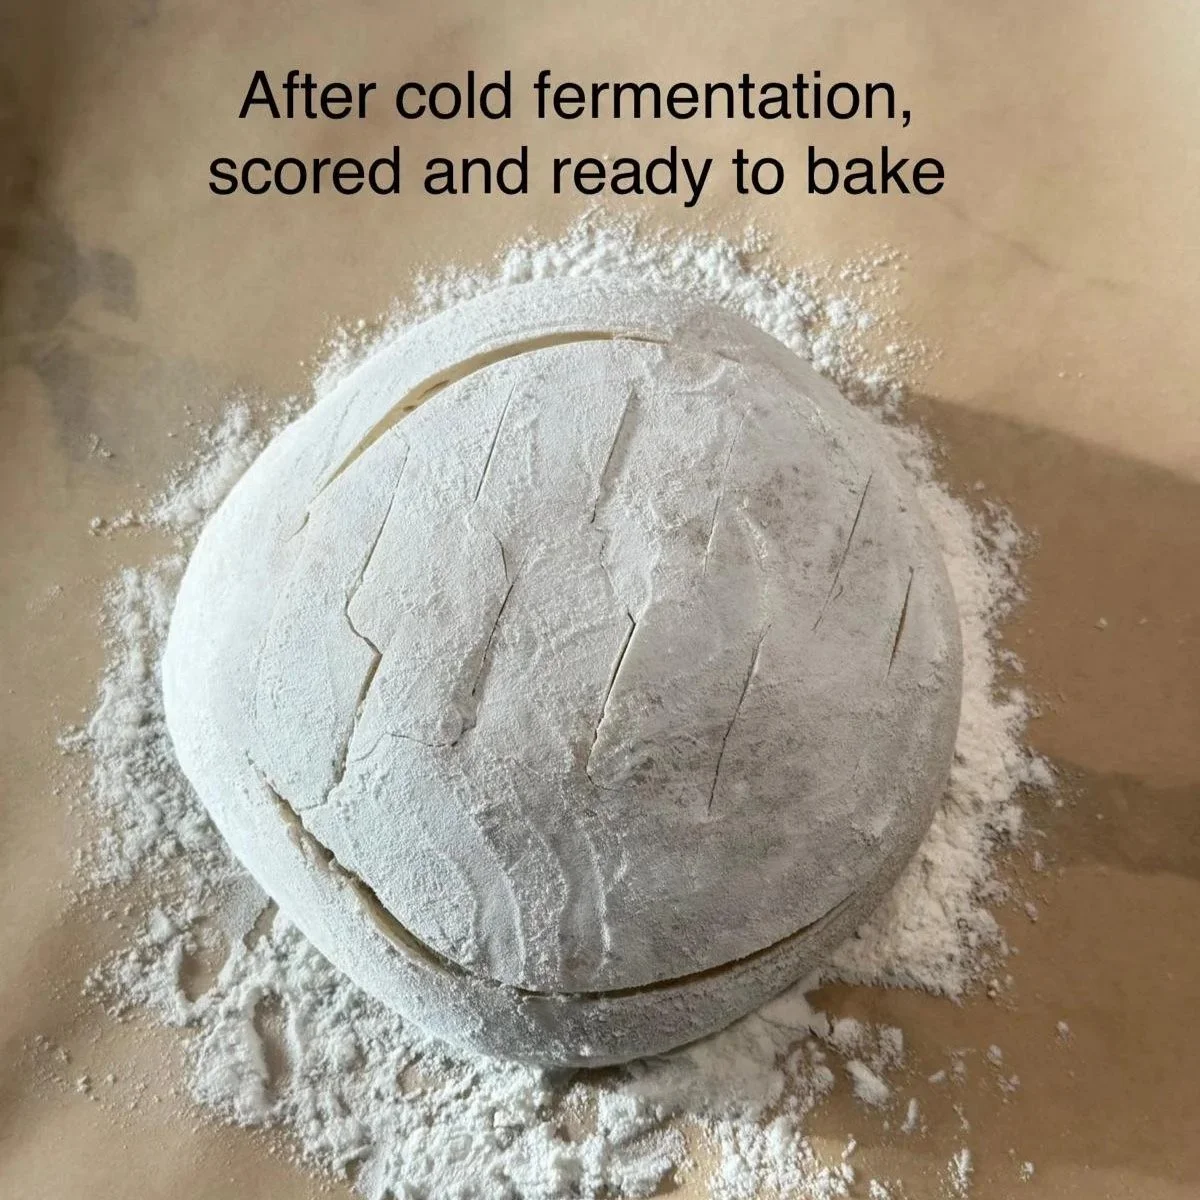
🥖 Step 7: Baking your bread (Finally!)
Preheat your oven with your Dutch oven inside to 450°F and remove the banneton basket from the fridge while you wait.
When ready to bake:
Flip your dough onto parchment paper
Score the top with a sharp knife or razor
Carefully place it into the hot Dutch oven and close the lid.
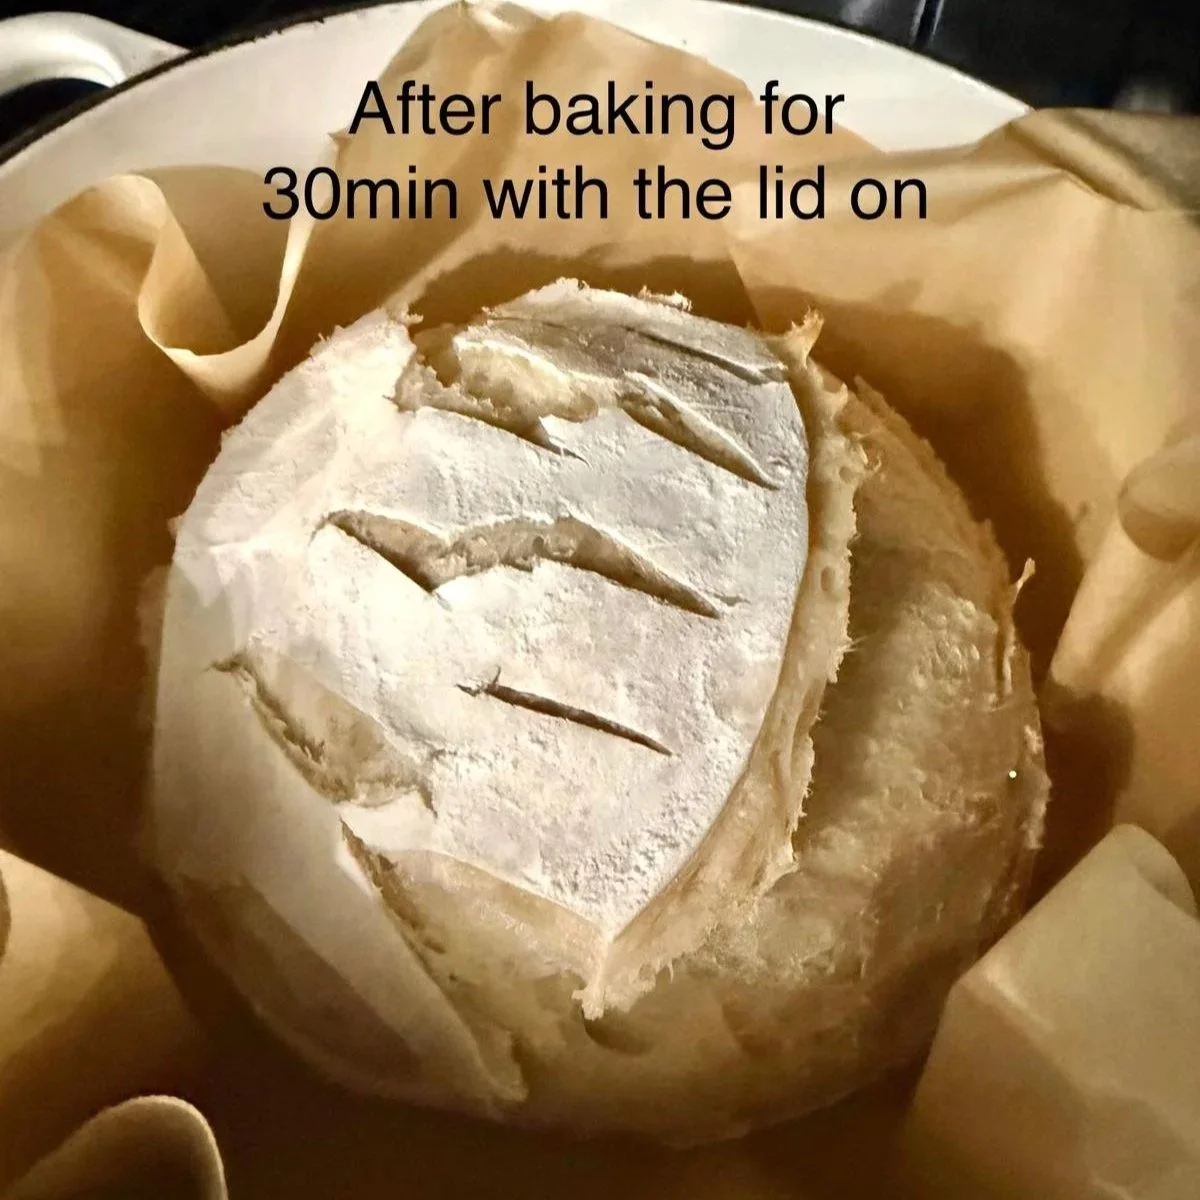
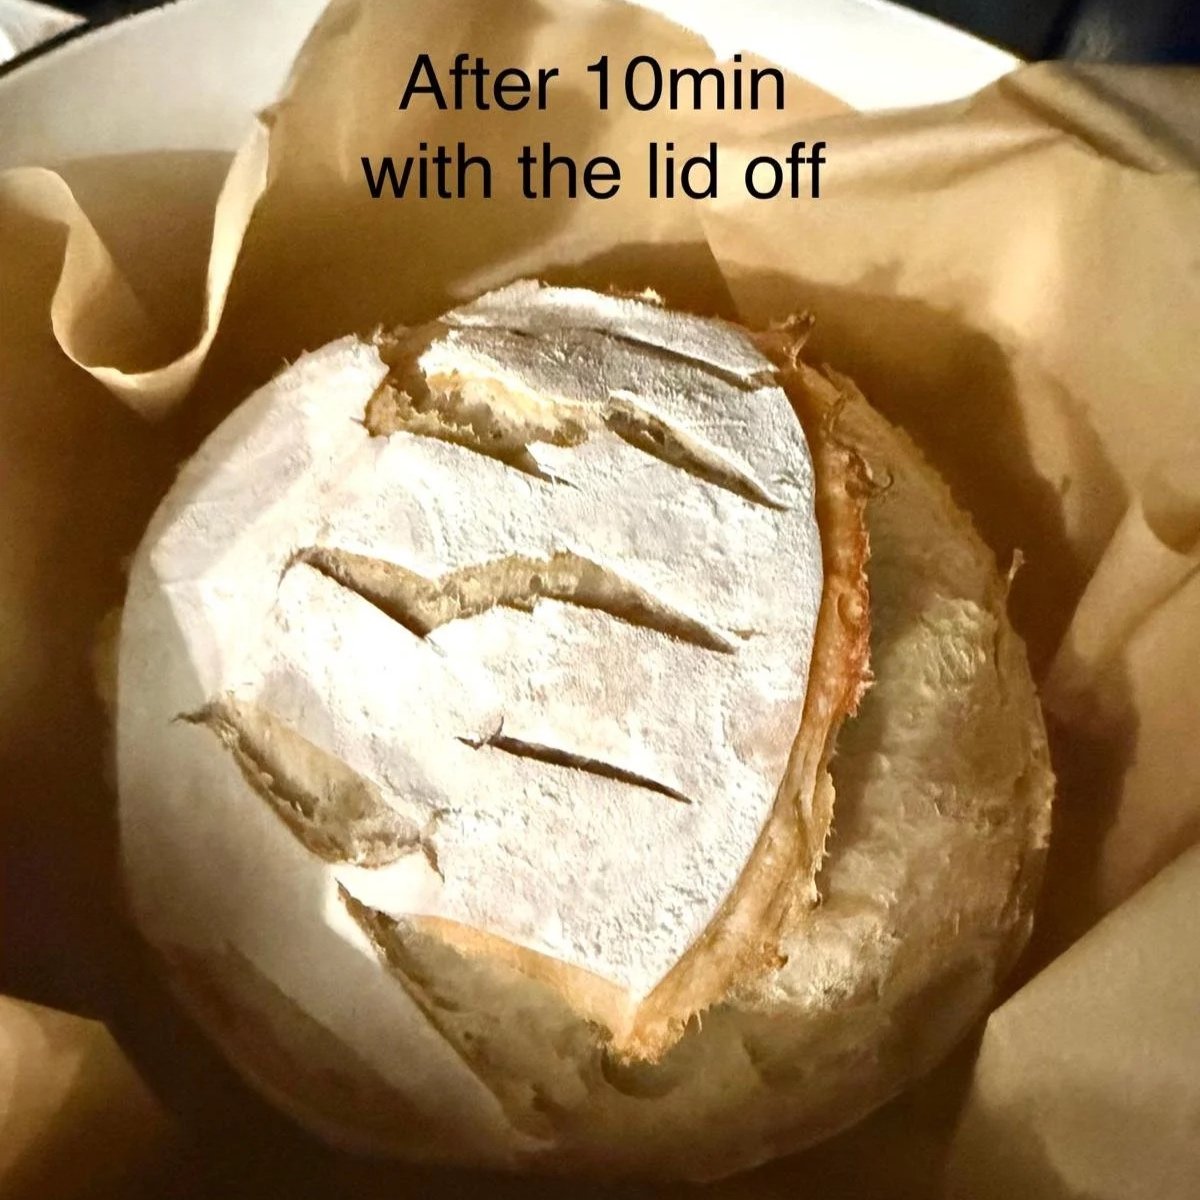
Bake:
30 minutes covered
10 minutes uncovered
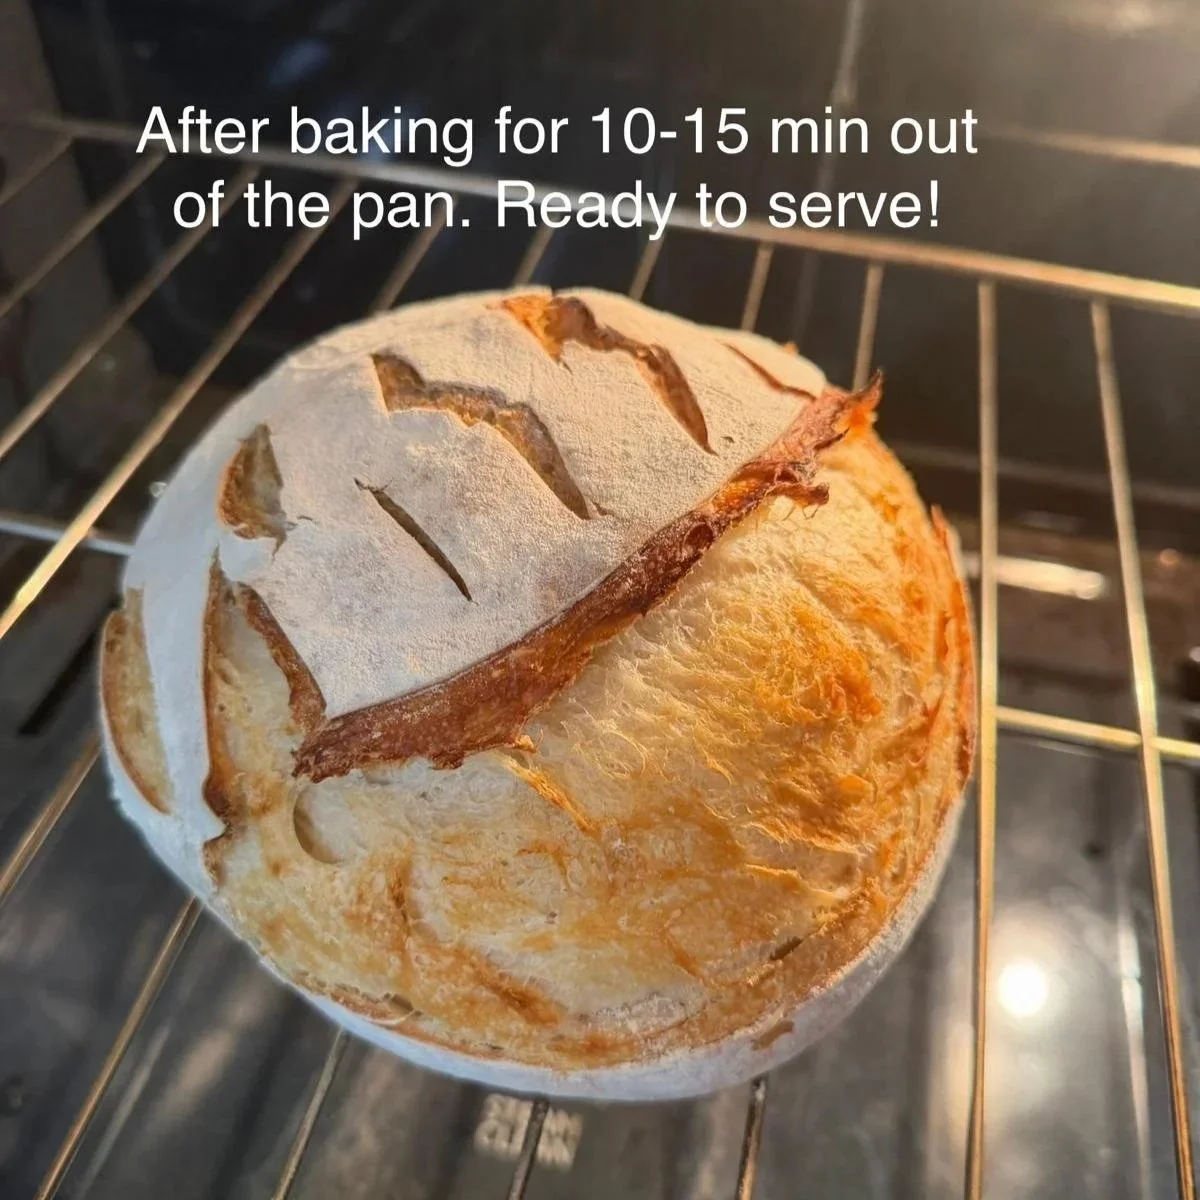
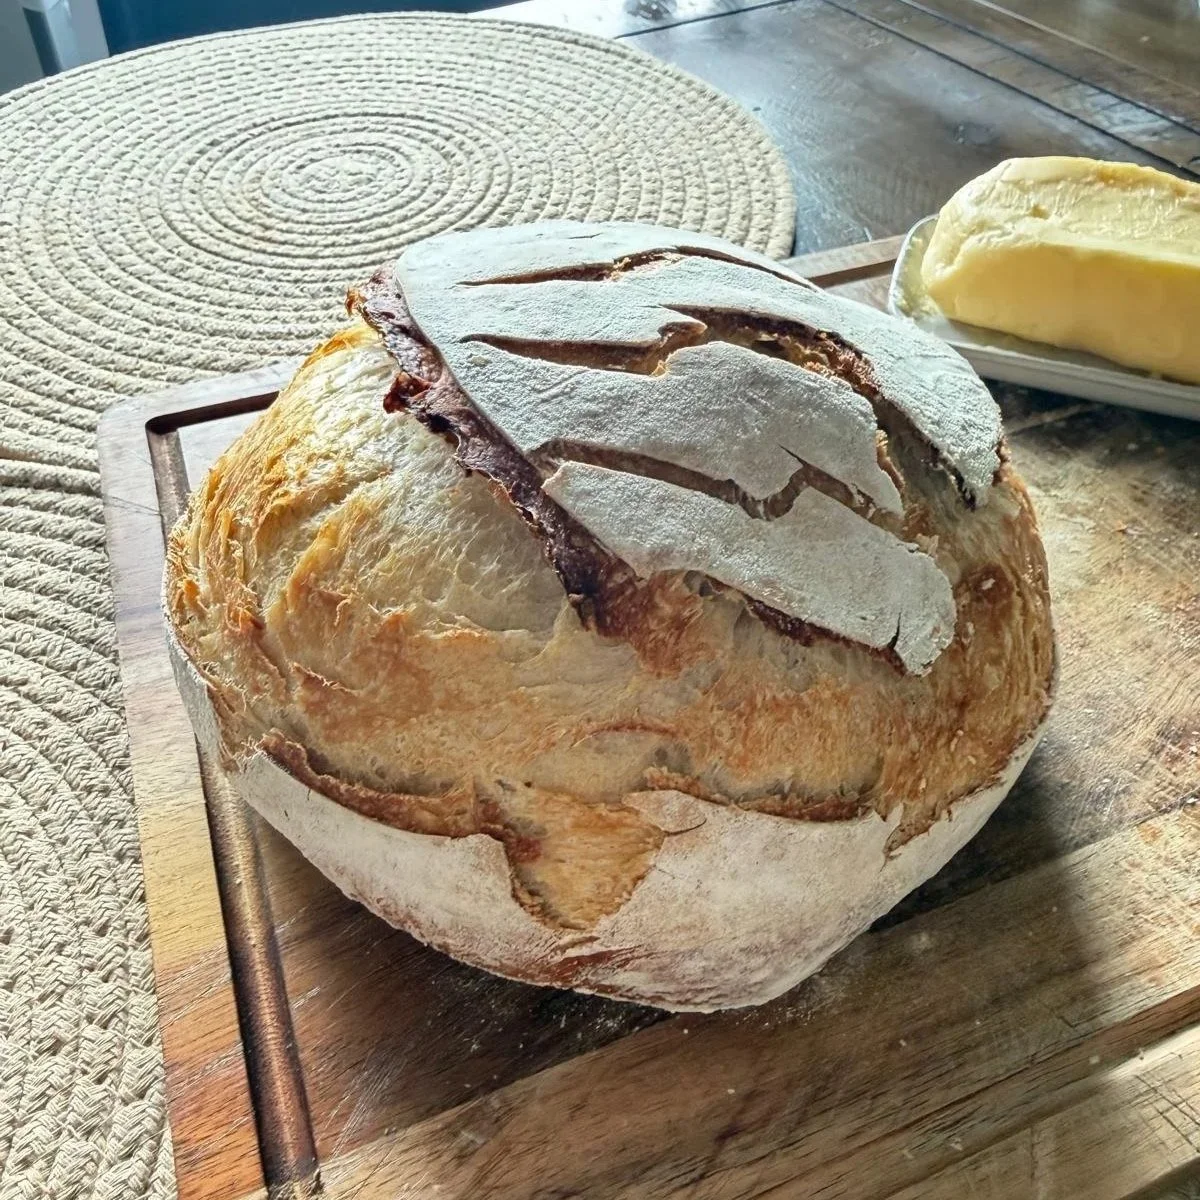
If you want your bread to be extra crispy and more evenly browned, remove it from the Dutch oven and place it directly on the oven rack. Bake for an additional 10–15 minutes, or until it reaches your desired level of color and crunch.
Let the bread cool completely before slicing so the inside can finish setting. (I’m guilty of not waiting so we can eat it warm with melting butter and it still works for me!)
IMPORTANT: Sourdough takes a little practice. So if your first loaf isn’t perfect, that’s completely normal! In the next post of this series, I’ll go over common issues you might run into and how to troubleshoot them.
I want to remind you that I’m not a professional baker. I’m simply someone who was curious, very intimidated, and decided to try anyway. When I first started with sourdough, I was honestly really scared of the process. It seemed complicated and easy to mess up. But the more I baked, the more I realized that sourdough is really about practice, patience, and learning as you go.
If you follow these steps, you can absolutely bake your first loaf. And as you get more comfortable and confident, you’ll naturally start adjusting things to fit your routine, your kitchen, and your taste. That’s part of the beauty of sourdough: every baker develops their own rhythm!
Thank You for Being Here!
If you try this recipe, I would love to hear how it goes. And if you have tips or small changes that worked well for you, feel free to share them in the comments so we can all keep learning together.
Thank you for being part of this space and for following along in this sourdough series.
If this post helped you, feel free to share it with another person who might be wanting to make their own bread too!
Follow along on social media for more motherhood, recipes, low-tox living, and real-life moments from our family.
I’d love to stay connected with you there 🤍
Together, we’re learning, growing, and making more intentional choices…
Because Together, We Are UNO 🤍